My dad asked me if I could shorten the sleeves on one of his button shirts. It's definately not because it's getting too warm (current temp: 34`F, tomorrow's forcast: SNOW). Maybe he has run out of short sleeves, or maybe he's just bored with that shirt. I don't know, I didn't ask. I was happy to take on the challenge and have a project to do.
Shortening Sleeves
1. Pick out a short sleeve shirt to use as a pattern (if possible). Iron both shirts well. Wrinkles will not help in getting an accruate cut.
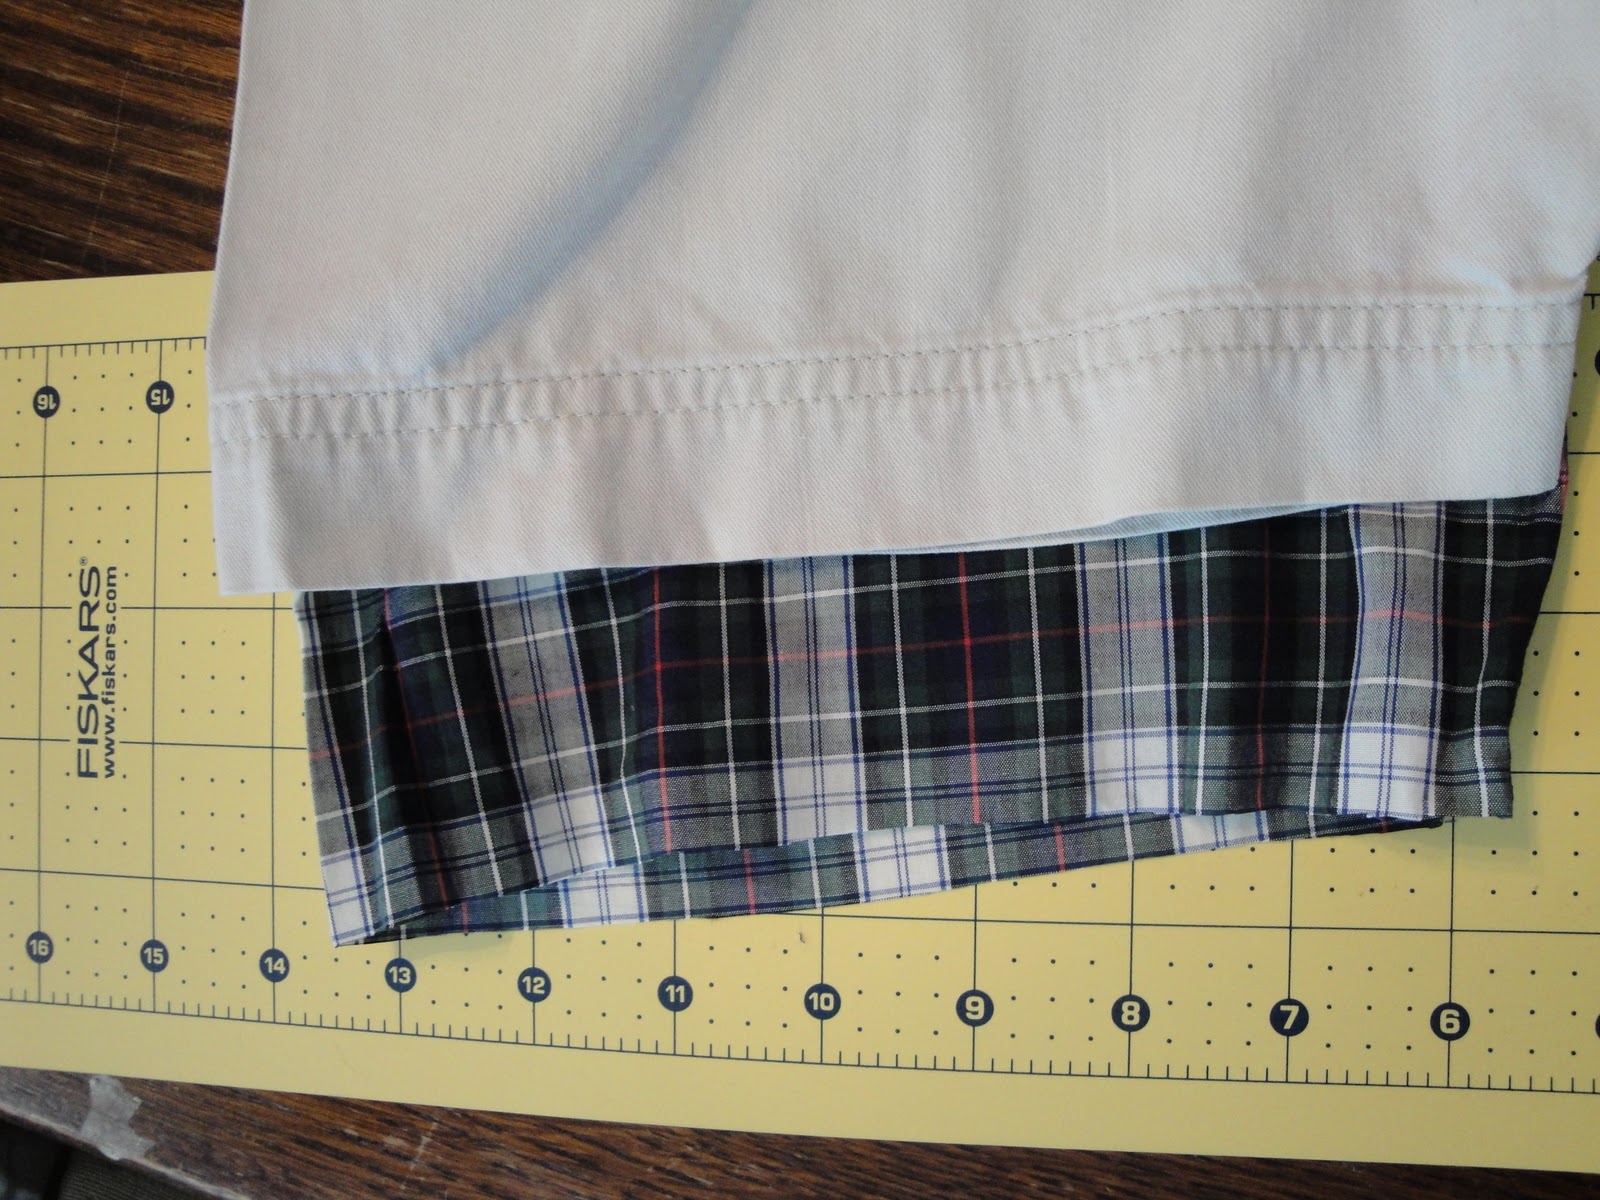
2. Lay short sleeved (SS) shirt on top of the long sleeved (LS) shirt. Make sure to match the seam of the sleeve and the shirt on both shirts. (the plaid shirt is the shirt I am altering)

3. Cut 2" from end of SS. This will give you enough room to make a double fold and end up with a nice finished edge.
4. Fold and press a 1/2" and then again 1". This is your new shirt sleeve edge.
5. Sew a double stitch seam. This makes it look professional, and like you would find in a store bought shirt.

Oops, I forgot to take a BEFORE picture, you all know what a long sleeve shirt looks like...right? (I hope)

Of course I kept the leftover pieces of the sleeves. You know I can't throw a good piece of fabric away, no matter how small. I think it's the perfect pattern for those little "tie onesies."
No comments:
Post a Comment